Saturday, February 4, 2012

GadgetReview - LG Nitro HD Review


The LG Nitro HD feels like a phone from the future. That future being about six or seven months from now, when most high-end phones are light and thin, have huge screens, and boast ultra-fast data connections. If you want a phone that won’t go obsolete overnight, this is your guy.
The Nitro costs $200 with a two-year contract and is one of AT&T’s first 4G LTE phones. LTE stands for long-term evolution, and it’s currently the fastest network speed you can get on a mobile device outside of a Wi-Fi hotspot. Verizon was the first of the major carriers to debut an LTE network in the U.S. late 2010, with AT&T following in fall 2011. Sprint has announced it’ll begin rolling out LTE in mid 2012.

AT&T’s LTE network is coming online slowly, though, and it wasn’t available in our market when we had the Nitro HD, so we weren’t able to test the LTE connection. Nevertheless, 3G data service was very good, running so fast at times it felt like 4G. That was thanks to AT&T’s HSPA+ 21 network, which the carrier also considers 4G. It was also probably helped by the 1.5GHz dual-core processor that powers the Nitro — fairly state-of-the-art as far as current smartphones.
If you’re not used to phones with big screens, you’re in for a treat as soon as you unbox the Nitro HD. The screen measures a relatively massive 4.5 inches (diagonal), with a screen resolution of 1,280 x 720 pixels. That equates to a pixel density of 329 ppi (pixels per inch) — which matches the so-called “retina” display of the iPhone 4 and iPhone 4S. However, I found the Nitro’s LCD screen to be not quite as eye-poppingly bright as today’s AMOLED phones, like the one on the Samsung Galaxy S II.

Apple iPad 2 Review

Only last year Apple managed to shock the computing and mobile world with a 9.7” Touchscreen tablet that was hardly foreseen. While some called the original Apple iPad as just a magnified iPhone, a few others criticised its name and tried some jokes that were not even remotely funny. Most of the early reviews of this revolutionary gadget were marginal at best, we loved it though. Most cried upon the lack of Adobe Flash and others over the missing cameras. Now, after about sixty thousand apps, and just a few weeks after the first real Android 3.0 tablet rival, the Motorola Xoom hit the market, Apple has let the iPad 2 to stroll back into this hard playing field. This 2nd version is much thinner and hence lighter than its predecessor, but otherwise it is essentially same, which allows it to keep its place on the cutting end in the world that is fully packed with the awesome Android intruders. While the Apple iPad 2 released first on 11th March in the US, UK got its first taste on 25th March.
Apple iPad 2
It will be kind of an understatement if we said that the Apple iPad 2 is an easy tablet to review, as it is a follow-up to the last year’s ‘crazy’-successful tablet. It is almost identical when it comes to software and, though it has some improved hardware, it is still closely related. Most of the enhancements on the iPad 2 are cosmetic, however it still has a few other notable enhancements such as the new dual core A5 CPU, additional memory and also a couple of new cameras. While this new model might not be breaking new grounds, it is already in front of the pack. Read on to find out if the original iPad owners should look to upgrade, and heaps more.

Design:
Not much different:
As far as industrial design is concerned, this tablet has set the bar almost unreachable as far as stuff like “sleek” is concerned. The iPad 2 does not look very different from its original. As with the previous version, the front of the device is all screen, except for the bezel, which appears to be slightly less broad than the other, and there is the home button in the bottom. Apart from this, there are the cameras, a tiny dotted speaker grid on the lower left side, and depending on the type of model you got, you will get a 3G camera on the top back. On the rear left side, there is volume, mute and rotate switch, and in the right, there is Micro SIM slot (on 3G models). Along the bottom, there is the standard 30 pin dock, and on the top, there is a power button, sleep button on the upper right side and a 3.5mm headphone jack on the left.
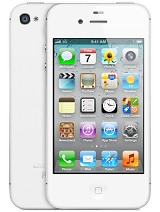
If you want to make it obvious to your friends that you have the latest version of the iPad, go for the white version, instead of the black one. While the white gives stylish look, the white bezel distracts from what is on the display, and seems to make the iPad 2 look like a kitchen appliance or digital photo frame, in iPhone 3GS, it was not that bad as that was white only on the rear.
Display:
iPad 2 the same 9.7″ IPS display with the similar 1024 x 768 pixels resolution. Though it still looks absolutely gorgeous, we would have liked to see a small bump in the resolution; though not up to the doubled numbers of the retina display, but something a little substantial. There are no issues what so ever as far as the quality of display such as colour balance, depth of black etc. But we would have definitely loved to see an enhanced resolution.


Apple Ipad 2


Slimmer and lighter:
Apple had put the iPad on a diet to get the latest version thinner and lighter. At 8.8mm thickness, compared to the original 13.4mm, it looks amazingly slim in reality, almost like a paper. Just after a few hours if reading and browsing, we really appreciate that the WiFi only version of the iPad 2 weighed just 160 grams. This is about 124 grams lighter than the original iPad, which was surprisingly heavy considering its slender form factor. This light weight is a big selling factor especially since it does not lose its battery life that soon.
Durable, yes but no:
The Apple iPad 2 is only 8.8mm thick, which is smaller than that of the thinnest smartphone in the current market, which is again, the Apple iPhone 4. With such dimensions, we feared that being wafer-thin, it would feel breakable; fortunately, having iPad 2’s aluminium case means that it feels incredibly sturdy. Though the iPad 2 can take some scratching and dents on its aluminium casing during normal using, however, if you drop it on a hard surface, you may have to kiss its display a goodbye.


The detachable cover:
The detachable cover attaches itself to the iPad’s magnets that are hidden in its chassis that clicks into its place just right. This cover can also be folded into a stand, which allows for a much more convenient typing as well as video viewing. Peeling of the protective screen of the iPad 2 wake it up immediately. This cover is not at all cheap, coming at £35 for the fabric version and about £65 for the leather version. The bad news is, it does not look as good as it looks in Apple’s tempting pixar inspired promotional video. The grey version is quite futuristic, but we recommend some of the less 70’s shades. The cover is really worth having if you can really afford it. It does not add any bulk to the iPad, and it is handy to have it wherever you are. The best part is, it is extremely quick to get it up and running. Well, we are not taking off ours.


iPad 2 Model types:
There are various iPad 2 models you can get; there is the WiFi (802.11a/b/g/n) only model, a 3G version and a GSM variety. Bluetooth 2.1+EDR is on-board, as is an AGPS chip in the 3G versions. All the models come equipped with an accelerometer, an ambient light sensor, and a new addition of a three-axis gyroscope.
User Interface:
Ease of use:
Since the iPad 2 from Apple do does not deal with any integrated physical keyboard or mouse, Apple has opted to keep the interface of this device as simple as possible. Tablets do not get along well with small icons and fiddly tasks; they will just do with human fingers. This one too has the same touch sensitive interface of the iPhone, just in a larger display; hence even kindergarten goers should have no issues using this. The trademark Apple Home button is present below the display, which will take you to the home screen. The main menu includes heaps of rectangular icons that are nothing but the revolutionary apps. Its simplicity also means that it is not as customizable as that of its other Android rivals, such as the Motorola Xoom. In iPad 2, you get to change the wallpaper and can also create categories for icons, but that is all that you get to do, whereas, with Android tablets, you will be able to fully pack the home screen with shortcuts and widgets; however, keep in mind that this flexibility comes at the cost of simplicity. Hence, it is up to you to decide, which quality is the most essential for you.
Banes of being simple:
Even though the simplicity of the iPad 2 Tablet is appreciable, it will prove to be an incredible drawback in some occasions. For instance, you get to interchange between the 2 apps that are active at the same time by just double clicking over the home button, but you will not get to view the apps side by side in two separate windows; this simply means that iPad will have issues with anything that is more complex than simple browsing. For instance, if you wish to compose a mail, if you just going to type it all, the process will be a breeze, however, if you wish to do some copy and pasting and all that stuff, then you will have to open more than one app. And even some of the most common tasks on a full sized computer like adding an attachment to a mail will be extremely hard and cannot be accomplished.
Editing on the iPad 2:
Even the simple tasks such as copy and paste can get really annoying on the iPad 2. To begin with, you will have to hold your finger on the text in order to highlight it. Then simply drag a few small markers around it to highlight the exact content you like. And, it is mostly impossible to get it right on web pages, especially since they are HTML formatted. Even if you get it right, you need to be a monk to press and drag the pointer wherever you want it to be. On the iPhone, the copy and paste will seem great with the lack of a mouse, and because of the fact that it quite a small gadget, any of its text editing capability will look just miracle like; whereas, on a tablet which is considered as an alternative to a laptop, this process feels ‘non-elegant’ and uncomfortable. The banes of a tablet can be felt especially as you try creating files in Pages, Keynotes and Numbers, which is nothing but Apple’s version of Word, PowerPoint and Excel.
Good luck with complex documents:
Overall, the interface is great, but when you try to create documents that are any more complex than a shopping list without the help of a keyboard and mouse, is nearly impossible; if you manage to create anything more than this, you can assume that you have incredible patience. The best you can do is, make use of the Google Docs in the browser to do any sort of serious typing on your system, and have any sort of access to your documents for reference and some quick editing. The Printing process is also pretty much plain, unless you got an AirPrint activated printer or any of the other third party enabled printing apps. So, just forget about trying any sort of serious work on the iPad 2, and simply stick with having fun.
Apps:
As you can expect from the Apple iPad 2 you get access to a huge collection of apps and games in the App Store. Gamers will simply love this gadget, they can choose between everything from some really addictive puzzles to the first person shooting games. You will also find some very useful apps from photo editors to guitar tuners. iPad allows you to do anything and everything from planning your workouts, diets, booking holidays and even plan your love life for you. Most of the major App titles tend to hit the App Store much before they appear on the Android market, and the best part is that, most of the time they cost less than a couple of pounds. You can also make use of the iPhone Apps on the iPad 2, but they do not use up the full screen, you have to use the pixel-doubling zoom. While this will make the images bigger, it will not take advantage of the higher resolution of the iPad 2, leaving you craving for the iPad version of the same app. Another major quibble here is that, you are locked into Apple’s App Store to get access to all of these apps, and hence, you can only use iTunes on a single system for syncing.

GarageBand:
One App that deserves special mentioning is Apple’s GarageBand, which really shows of the touchscreen possibilities of the iPad 2. This app allows you to record a number of tracks with the help of ‘real’- sounding virtual musical instruments, or they can be simply described as “cheating instruments” that play themselves for you. While this is not the app for the pros who love to do it all by themselves fiddling with innumerable knobs on a desk, it will surely interest the beginners who seem to be getting addicted to creating songs on the iPad 2. We were left wishing if only you get to export tunes to the music player on the iPad 2, instead of being forced to sync them first in the computer first.


Photo Booth:
Apple tempts the iPad 2 users into making use of its new 0.3 megapixels in the fascia and 0.91 megapixel rear cameras with an amazing and addictive app called Photo Booth. This app is pretty much straightforward and this basic app can also be used to create funny photos for your Facebook profile and other social media, but is not recommended for any serious editing.

FaceTime:
You also get FaceTime on the New Apple iPad 2, which you must be aware by now, a video calling app. With this app, you are allowed to call people using the above mentioned front or rear facing cameras, but with only those of you who own a Mac, iPhone 4, iPod Touch and iPad 2. The FaceTime experience on the iPad is not so different than what can be got out of the iPhone or OS X computer. Though the layout might be a little different, you will basically get the same results. When we tested this feature, we were stunned at the excellence of video quality, when compared to some of the major rivals in this feature, such as the Skype. Unfortunately, you will not be able to share this fun with your other mates owning any other kind of smartphone.


Friday, January 13, 2012

How to access blocked web sites from school, office, or work using JAP


Looking for a way to access blocked websites like Orkut, YouTube, MySpace, FaceBook, etc from school or work? Most people end up trying out the million or so proxy servers out there, but those are usually dead ends. Also, those proxy servers are very slow and it can take a year for a single web page to load sometimes! There’s luckily an easier way to access blocked websites that doesn’t rely on proxy servers!
JAP is a free open-source software tool that can be used to browse the web anonymously and unobservably. Whenever you browse the Internet, your IP uniquely identifies your computer and your location to the requesting servers, thereby reducing your privacy. JAP uses a single static IP address for many JAP users, thereby making it impossible for the visited website or any sniffer to determine which user visited.
JAP
The extra benefit that we can also get out of using JAP other than anonymous browsing is the fact that it can be used to access blocked web sites! That’s because all requests are first passed to JAP servers, then the requested sites are retrieved from their servers. Basically, for the local servers that control your access, it looks as if you’re always requesting something from the JAP web site, not FaceBook or MySpace, etc.
Here’s how to setup JAP: first download the JAP app from the link above. Install it and make sure it’s up and running. Then all you have to do is change some of the settings in Internet Explorer or Firefox. You have to change the LAN Settings so that the Default Gateway is 127.0.0.1 and the port is 4001.
In IE, click on Tools, then Internet Options, and click on the Connections tab.
lan settngs
If you’re connecting to the Internet using a dial-up, modem, or ISDN connection, choose your connection and then click on the Settings button at the top. If you’re connected permanently using a LAN, Cable or DSL connection, click on the Settings button under Local Area Network (LAN) settings heading.
browse anonymously
Check the Proxy Server box and type in the IP address and port number shown above.
For Firefox, you click on Tools, then Options, and then click on the Advanced tab. Under Connection, click on Settings.
jap ports
Click on Manual Proxy Configuration and enter in the same information. Check the box to use this proxy for all protocols. You can also download a cool plugin in Firefox called SwitchProxy that will allow you to quickly switch between JAP and normal browsing.
You should now be able to access blocked web sites while JAP is running. However, if you are at the office or at school and the only ports that are open are port 80, and 443, then JAP won’t work without a little more tweaking.
  • In JAP under “Config/InfoService“, change the port from 6543 to 80
  • Go to the “Config/Anonymity” page. Click on the “Fetch” button and choose the “Dresden-Dresden” cascade from the drop down menu.
  • Select the “Manual Configuration” radio button and change the Anon-Port from 6544 to 443
Now try to activate the anonymous web access. If you’re able to connect, you’ll now be able to browse web sites using the normal web access ports so even if your company or school blocks all other ports, you’ll still be able to access JAP.
Also, if your company forces you to access the web through a proxy server, then you’ll need to configure that in JAP. You can see if you have to go through a proxy server by checking out the values in the above LAN settings section. If it’s greyed out with something already in there when you tried to change it to 127.0.0.1, that means you’re going through a proxy server.
In that case, in JAP you need to do the following:
  • Activate the checkbox under “Config/Proxy-Firewall” and enter the address of the required proxy. Some proxies require a user authorization. If this is the case, activate the appropriate checkbox and enter the User ID. (First try it without authorization and only do this step if it doesn’t work.)
  • Under “Config/InfoService“, change the port number from 6543 to “80″.
  • Go to the “Config/Anonymity” page. Click on the “Fetch” button and choose the “Dresden-Dresden” cascade from the drop down menu.
You should now be able to connect to the JAP service and access any web site that you like! If that was too technical or something was not explained clearly, please post a comment and I will try to help as much as possible! Enjoy!

How to fix USB device not recognized in Windows

Are you getting a “USB device not recognized” error whenever you plug in a USB mouse, keyboard, or other USB device? I love USB and have 5 ports on my computer so that I can connect my mouse, keyboard, camera, phone, and printer to it all at once!
However, last weekend, my computer stopped recognizing my USB devices! The strange thing about it was that the USB ports were not bad because all of my devices were still getting power to them. I could still charge my cell phone without a problem!
usb device not recognized
So I started with the normal fixing methods, including uninstalling the drivers for my devices and reinstalling them. That didn’t work! Next I tried System Restore thinking that maybe I had installed something and it caused a conflict with the USB system drivers. That didn’t work!
I read online that in order to fix this problem I should go to Device Manager and uninstall all of the devices under USB Controllers. Restarted the computer, reinstalled the USB drivers, but the problem STILL did not go away!
You may also see in Device Manager that the device shows up as an “Unknown Device”.
unknown usb device
So how did I finally fix the problem? Well, apparently it’s a super simple solution! No need to edit the registry, uninstall drivers, or anything of that sort.
Simply UNPLUG YOUR COMPUTER FROM THE POWER SUPPLY. Yes that’s it! Note that this does not mean just turning off your computer because modern computers don’t really turn off when you press the power button as the motherboard still gets power.
First to explain, the motherboard is where all of hardware of the computer is connected to, including the USB ports. Sometimes the motherboard needs to be “rebooted” also because something can go wrong, i.e. all your USB ports suddenly stop working. The small microprocessor on the motherboard will reload the drivers and your USB ports should be back to recognizing all devices!
So first turn off your computer using Shut Down or pressing the power button and then UNPLUG it from the wall outlet. Let it sit for about a minute and then plug it back in.
Hope this helps someone fix that pesky “USB device not recognized” Windows error!

Google Chrome Shortcuts – 70 Useful Shortcuts to Boost Performance


google-chrome-shortcuts Google Chrome shortcuts provide an easy and effective way to improve productivity and Internet browsing  performance when using Google’s web browser. From Page Navigation to managing Pages and Tabs to speeding up Web Page and Address bar tasks this posts will cover 70 Chrome shortcuts for  boosting your efficiency using the Chrome web browser.
Many people feel that Chrome performs much faster than Internet Explorer and Firefox and find it to be a very stable web browser. Utilizing these built in keyboard shortcuts can make Chrome’s Internet browsing performance seem even faster.
A number of the Chrome shortcuts will be a combination of keystrokes. “Ctrl + C” means that you should hold down the Ctrl (control) key and press the letter “c” for example. Use the lowercase letters not uppercase; if you are required to use the shift key it will be indicated as “Shift”.


Chrome Page Navigation Shortcuts

These browser shortcuts are all scrolling functions that permit you to use the keyboard to navigate a Chrome web page quickly and efficiently. You will find that many of these navigation shortcuts are quite similar to other browsers.
  • Space Bar – Page down one full screen at a time
  • Page Down — Page down one full screen at a time
  • Down Arrow – Scroll Down
  • Shift  + Space Bar – Page up one full screen at a time
  • Page Up — Page up one full screen at a time
  • Up Arrow – Scroll Up
  • Home – Go to the top of the webpage
  • End – Go to the bottom of the webpage

Chrome Browser Window Shortcuts

These shortcuts open and close Google Chrome browser windows.
  • Ctrl + N – Open a new window
  • Ctrl + Shift + N – Open a new window in incognito mode (Pages viewed in incognito mode won’t show in browser history or search history. They also won’t leave cookies or other traces)
  • Alt + F4 – Close the current window
  • Shift + Click on link – Open the link in a new window

Chrome Tab Shortcuts

These browser shortcuts provide quick control of Chrome’s Tabs and allow you to quickly switch between open Tabs, open or close a Tab, and open or close links in new Tabs within the Chrome browser.
  • Ctrl + Click on link – Open link in a new tab in the background
  • Ctrl + Shift — Click on link – Open the link in a new tab and switch to the newly opened tab
  • Ctrl + T – Open a new tab
  • Ctrl + Shift + T – Reopen the last tab that was closed
  • Ctrl + 1 through Ctrl + 8 – Switch to the tab at the specified position
  • Ctrl + 9 – Switch to the last tab
  • Ctrl + Tab – Switch to the next tab
  • Ctrl + Shift + Tab or Ctrl + PgUp – Switch to the previous tab
  • Backspace – Go to the previous page in your browsing history for the tab
  • Shift + Backspace  – Go to the next page in your browsing history for the tab
  • Ctrl + W – Close the current tab or pop-up
  • Alt + Home – Go to your homepage in the current tab
  • Ctrl + Click the Back Arrow, Forward Arrow, or Go button – Open destination in a new tab in the background
  • Drag a link to a tab – Open the link in the tab
  • Drag a link to a blank area on the tab strip – Open the link in a new tab
  • Drag a tab out of the tab strip – Open the tab in a new window
  • Drag a tab out of the tab strip and into an existing window’s tab strip – Open the tab in the existing window
  • Press ESC while dragging a tab – Return the tab to its original position

Chrome Webpage Shortcuts

You are able to manage many common browser tasks with these Google Chrome shortcuts, including bookmarks, search functions, utilities, and more.
  • Ctrl + P – Print the current page
  • Ctrl + S – Save the current page
  • Ctrl + O – Open a file from your computer in Google Chrome
  • F5 – Reload the current page
  • Esc – Stop page loading
  • Ctrl + F5 – Reload the current page (ignore cached content)
  • Ctrl + D – Bookmark the current webpage
  • Ctrl + Shift + D – Save all open pages as bookmarks in a new folder
  • Alt + Click on link – Download link
  • Ctrl + F – Open the search box
  • F3 – Find the next match for your input in the search box
  • Shift + F3 – Find the previous match for your input in the search box
  • F11 – Open page in full screen mode
  • Ctrl + + – Make the text larger
  • Ctrl + -  – Make the text smaller
  • Ctrl + 0 – Return text to normal size
  • Ctrl + Shift + B – Toggle the bookmarks bar
  • Ctrl + H – View the History page
  • Ctrl + J – View the Downloads page
  • Shift + Esc – View the task manager
  • Ctrl + Shift + Delete – Open the Clear Browsing Data Dialog
  • F1 - Open the Help Center in a new tab
  • Ctrl + U – View page source code

Chrome Address Bar Shortcuts

All of these Chrome keyboard shortcuts affect the contents in the Chrome browser address bar and can improve searching functionality within Chrome.
  • Type a search term, then press Enter – Perform a search using your default search engine
  • Type a search engine URL, then press TAB, type a search term, and press Enter – Perform a search using search engine associated with the URL
  • Ctrl + Enter after typing base web address – Automatically add ‘www.’ and ‘.com’ what you have typed in the address bar and open that web address.
  • F6 – Highlight address bar contents
  • Type a web address then Alt + Enter – Open web address that appears in the address bar in a new tab
  • Ctrl + K – Initiate a Google search with the address bar. After typing the shortcut key, a ‘?’ will appear in the address bar. Type your query then press Enter.
  • Ctrl + Right Arrow – Jump to the next word in the address bar
  • Ctrl + Backspace – Delete the previous word in the address bar
  • Select an entry from the drop down menu in the address bar, then press Shift — Delete – Delete the entry from the browsing history
  • Click an entry in the address bar drop down list with the Middle Mouse Button – Open that URL in a new tab

Chrome Mouse Shortcuts

Google Chrome also allows a few shortcuts to be executed with the mouse buttons and scroll wheel.
  • Middle click on link – Open the link in a new tab in the background
  • Shift + Middle click on link – Open the link in a new tab and switch to the newly opened tab
  • Middle click on tab – Close the tab
  • Click the Back Button, Forward Arrow, or Go button with Middle Mouse Button -  Open destination in a new tab in the background
  • Shift + Scroll Wheel – Scroll horizontally
  • Ctrl + Scroll Wheel – Increase or decrease text size
Quite a list of potential productivity boosting keystroke shortcuts! Some Google Chrome shortcuts are rather basic and others may take a bit of time to get used to, but once you learn to master even a handful of them you will see an increase in your efficiency and speed when navigating and browsing the Internet. The best learning method is often to start small with the functions you use most frequently within Chrome and expand on the list as you learn. Here a useful video for more insights.

Gmail Backup – Backing Up Gmail Data to Your Computer


gmail-keyboard-shortcuts Gmail keyboard shortcuts are a great way to increase your computing performance. These small combinations of keystrokes within Gmail can be a real productivity booster and help you avoid having to move your hand from keyboard to mouse as frequently. Our previous posts on keyboard shortcuts have included Firefox shortcuts, Internet Explorer shortcuts, Google Chrome Shortcuts and Windows shortcuts. Here are 45 timesaving Gmail keyboard shortcuts to help increase your efficiency when using the Google mail environment.

Gmail Keyboard Shortcuts – Some Differences

Gmail shortcuts are somewhat different than browser keyboard shortcuts for two main reasons:
  1. Limits on Keystroke Choices: when using Gmail keyboard shortcuts you are working within a web browser so Gmail cannot duplicate any of the standard shortcut key combinations used by Firefox, Internet Explorer, Chrome, Safari or Opera web browsers;
  2. Functions Vary by Location: Gmail shortcut functionality is based on your location within Gmail. Some shortcuts function only when reading a message or conversation, some work only when viewing conversation lists such as Inbox or All Mail, or viewing Contacts or Tasks.
Activating Gmail’s Keyboard Shortcuts
Before these shortcuts can be used you have to make sure that the Keyboard Shortcuts Setting for Gmail is set to “on” in Gmail Settings as shown here:
Gmail-Keyboard-shortcuts
To help clarify how Gmail keyboard shortcuts are used they have been grouped below by functionality, such as Navigation, Selection, Management or General.

Gmail Top Level View Navigation Shortcuts

These combinations of keystrokes speed up navigating among top level views such as Inbox, Sent Mail, All Mail, Spam, Trash, Drafts, Contacts and Tasks.  All letters in the keystroke combinations are shown in lower case but are not case sensitive. An example: “g then i” means press the “g” key then the “i” key, one right after the other.
  • g then i –  Open the Inbox.
  • g then s –  Open Starred.
  • g then t –  Open Sent Mail.
  • g then d –   Open Drafts.
  • g then a –  Open All Mail.
  • g then c –  Open Contacts.
  • g then k –  Open Tasks.

Gmail Selection and Management Shortcuts

These combinations of keystrokes are used within a specific view such as Inbox or All Mail to assist with quickly managing messages and conversations.
  • * then a –    Select all conversations.
  • * then n –    Deselect all conversations.
  • * then r –    Select only read conversations.
  • * then u –    Select only unread conversations.
  • * then s –    Select only starred conversations.
  • * then t –    Select only unstarred conversations.
  • x — Select a specific conversation; puts a check in checkbox; works as a toggle.
  • s – Stars a specific conversation; works as a toggle.
  • . – Open the More Actions dropdown list; works as a toggle.
  • e — Archive a conversation from current View into the All Mail View.
  • l – Open the Labels dropdown list to allow you to apply a label to a conversation.
  • # — Move the selected conversation to the Trash.
  • <Shift> + i — Mark selected conversations as read.
  • <Shift> + u – Mark selected conversations as unread.

Gmail Message Navigation Shortcuts

These Gmail keyboard shortcuts are used for navigating within conversations lists or views. The small black arrow at the left of the conversation list indicates the current conversation focus.
  • u – Return to conversation list (View) from current conversation.
  • k – Move to newer conversation; location indicated by black arrow on left.
  • j – Move to older conversation; location indicated by black arrow on left.
  • <Enter> or o –    Open selected conversation; black arrow indicates selection.
  • <Shift> + <Enter> or <Shift> + o — Open a conversation in a new window; black arrow indicates selection.
  • p — Read previous message within a conversation.
  • n — Read next message within a conversation.
  • r – Reply to sender when a conversation is open.
  • <Shift> + r — Open the reply in a new window.
  • a — Reply to all when a conversation is open.
  • <Shift> + a — Open the reply to all in a new window.
  • f — Forward current conversation when a conversation is open.
  • <Shift> + f — Open the forward current conversation in a new window.
  • <Ctrl> + s — Save a new or edited conversation as a draft. Cursor must be in a text field.
  • [ -- Archive the current conversation and move to the previous one.
  • ] – Archive the current conversation and move to the next one.

Gmail General Top Level Shortcuts

  • c – Open a new message.
  • <Shift> + c – Open a new message in a new window.
  • / — Move cursor to the entry box for Search Mail.
  • z – Undo previous action. Mainly used when typing and works as an “undelete”.
  • Esc – Remove the cursor from a search box or any input field.
Standard Windows shortcuts such as <Ctrl> + c, <Ctrl> + x and <Ctrl> + v are also useable within Gmail when editing text. Most browser shortcuts such as <spacebar> and Shift + <spacebar> for scrolling up or down a page are also usable.
Some other locations for more information on Gmail keyboard shortcuts include the Gmail Help Center and the Official Gmail Blog.

Apple iPhone 4S-Review


CDMA available only if sold and activated for use on a CDMA network.


General2G NetworkGSM 850 / 900 / 1800 / 1900

CDMA 800 / 1900
3G NetworkHSDPA 850 / 900 / 1900 / 2100

CDMA2000 1xEV-DO
Announced2011, October
StatusAvailable. Released 2011, October

BodyDimensions115.2 x 58.6 x 9.3 mm
Weight140 g

DisplayTypeLED-backlit IPS TFT, capacitive touchscreen, 16M colors
Size640 x 960 pixels, 3.5 inches (~330 ppi pixel density)
MultitouchYes
ProtectionScratch-resistant glass, oleophobic coating

SoundAlert typesVibration, MP3 ringtones
Loudspeaker Yes
3.5mm jack Yes

MemoryCard slotNo
Internal16/32/64 GB storage, 512 MB RAM

DataGPRSYes
EDGEYes
SpeedHSDPA, 14.4 Mbps; HSUPA, 5.8 Mbps
WLANWi-Fi 802.11 b/g/n, Wi-Fi hotspot
BluetoothYes, v4.0 with A2DP
USBYes, v2.0

CameraPrimary8 MP, 3264x2448 pixels, autofocus, LED flash, check quality
FeaturesTouch focus, geo-tagging, face detection, HDR
VideoYes, 1080p@30fps, LED video light, video stabilization, geo-tagging, check quality
SecondaryYes, VGA, 480p@30fps, videocalling over Wi-Fi only

FeaturesOSiOS 5
ChipsetApple A5
CPUDual-core 1 GHz Cortex-A9
GPUPowerVR SGX543MP2
SensorsAccelerometer, gyro, proximity, compass
MessagingiMessage, SMS (threaded view), MMS, Email, Push Email
BrowserHTML (Safari)
RadioNo
GPSYes, with A-GPS support and GLONASS
JavaNo
ColorsBlack, White

- MicroSIM card support only

- Scratch-resistant glass back panel

- Active noise cancellation with dedicated mic

- Siri natural language commands and dictation

- iCloud cloud service

- Twitter integration

- Google Maps

- Audio/video player and editor

- Image editor

- Voice command/dial

- TV-out

Battery
Standard battery, Li-Po 1432 mAh
Stand-byUp to 200 h (2G) / Up to 200 h (3G)
Talk timeUp to 14 h (2G) / Up to 8 h (3G)
Music playUp to 40 h

MiscSAR US
1.18 W/kg (head) 0.98 W/kg (body)
SAR EU
0.99 W/kg (head) 0.99 W/kg (body)
Price group